Screen Printing Supplies for Every Setup
Screen printing supplies cover the tools and consumables used to transfer designs onto fabric, paper, and other surfaces. A typical setup includes a mesh screen, frame, stencil or emulsion, squeegee, ink, and a stable work surface. Beginners may start with a single-screen kit, while experienced printers often select components separately to suit production volume and artwork. Common categories include screens and frames, screen printing inks, photo emulsion and exposure tools, squeegees, presses, cleaning products, and registration accessories. Choices vary for textile printing, poster making, craft projects, and small-batch merchandise. Ubuy helps shoppers discover international screen printing products and compare equipment types and specifications. Considering the intended substrate, design detail, available workspace, and repeat quantity before buying can prevent mismatched supplies and make a setup easier to expand.
- Core tools include screens, squeegees, ink, and stencils
- Supplies vary by substrate and production scale
- Plan around artwork, workspace, and intended use
Screens, Frames, and Mesh Counts
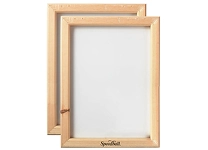
A screen combines mesh stretched across a frame, creating the surface through which ink passes. Mesh count describes the number of threads per inch and influences how much ink can flow and how much detail the stencil can hold. Lower mesh counts are often considered for thicker inks or bold designs, while finer mesh can suit detailed artwork and thinner inks; the best choice also depends on the material and ink formulation. Frames may be wood or metal, with rigid frames commonly chosen for repeatable tension and durability. Check the screen dimensions against the design area and press or hinge setup. For multi-color printing, consistent screen sizes can simplify registration. Keep mesh clean and inspect it for damage, uneven tension, or dried ink before starting a print run.
- Match mesh count to ink, artwork, and substrate
- Check frame dimensions and press compatibility
- Inspect mesh condition and clean it after use
Screen Printing Inks and Substrates
Ink selection affects color, opacity, texture, curing requirements, and how a print performs on its substrate. Water-based inks are used for many fabric applications and can create a soft-feeling print, while plastisol inks are commonly used in textile screen printing and generally require suitable heat curing. Specialty options include metallic, puff, fluorescent, and discharge inks; each has specific handling and compatibility considerations. For paper, posters, and craft surfaces, choose an ink formulated for the material rather than assuming textile ink will work. Check product instructions for curing, cleanup, storage, and recommended mesh. Test color and adhesion on a sample before committing to a finished item, especially with unfamiliar fabrics or coated surfaces. Brands such as Speedball and Jacquard are recognized in screen printing and art supply categories.
- Choose ink formulated for the intended surface
- Compare opacity, finish, and curing requirements
- Test adhesion and color on a sample first
Emulsion, Stencils, and Exposure Tools
A stencil controls where ink passes through the screen, and photo emulsion is a common method for creating detailed, repeatable designs. Emulsion types differ in water resistance, exposure behavior, and suitability for particular inks, so follow the manufacturer's instructions when coating, drying, exposing, and washing out a screen. An exposure unit or compatible light source helps transfer a film-positive design onto the coated mesh; exposure time depends on the emulsion, light source, screen, and artwork. Keep film positives opaque where the design should block light, and use a scoop coater to apply a more even layer. Beginners may also consider hand-cut stencils for simple artwork. Store light-sensitive materials as directed, and clean screens promptly after printing to support reuse and preserve detail.
- Select emulsion for ink type and washout needs
- Exposure depends on the light source and materials
- Use film positives or hand-cut stencils as appropriate
Squeegees, Presses, and Printing Accessories
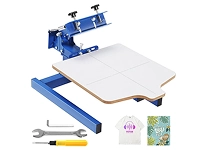
A squeegee pushes ink through open mesh and across the printing surface. Blade hardness, profile, and width affect ink deposit and control; choose a blade that suits the artwork, ink, screen, and material, and keep it clean and free of nicks. A tabletop press, hinge clamps, or a multi-station press can help hold screens steady and support repeatable placement. Registration guides, screen tape, spatulas, ink knives, and test materials are useful accessories for setup and production. For multi-color designs, registration marks and a stable press setup help align each layer. Consider the available work area, number of colors, and expected print quantity when comparing equipment. Brands including Riley Hopkins and M&R are associated with screen printing equipment, while product specifications should guide compatibility decisions.
- Choose squeegee blade characteristics for the print job
- Press type should suit space and production needs
- Registration tools help align multi-color artwork
Select the Right screen printing supplies
Start by identifying what you plan to print, how many colors the design uses, and how often you expect to produce it. Then match the screen dimensions and mesh to the artwork, choose ink designed for the substrate, and confirm that your emulsion and exposure setup work together. Check curing needs and make sure the workspace can accommodate the press, screens, drying area, and cleanup routine. A beginner may prioritize a manageable starter setup and essential cleaning tools; a growing print operation may need additional screens, consistent registration equipment, and spare squeegee blades. Compare product instructions, sizes, materials, and compatibility details rather than relying on a single feature. Ubuy can be used to explore international screen printing supplies across these product types. Proper storage, prompt cleaning, and routine inspection help keep reusable equipment ready for future projects.
- Build a setup around substrate, artwork, and print volume
- Verify compatibility, dimensions, and care instructions
- Allow for workspace, curing, and screen cleaning